Brilliant Prints and Effortless Setup
Printers For Your Business
Canon printer setup
High-quality goods and superior printing characteristics are the focus of Canon Printers.There are several models and sizes to choose from to accommodate various demands. Canon printers are useful for usage in the workplace, home, or commercial setting. You must first complete the Canon Printer Wireless Setup to use these printers. Still, you’ve come to the ideal spot if you’re clueless about how to execute the setup. We have discussed linking Canon printers employing both wireless and wired settings in this article. Alright, let’s get specific. Well mentioned are the steps
canon printer setup requirements
- Every Wi-Fi-capable device, including a personal computer, iPad, Apple, your portable device, Mac, and even an Android phone, can be smoothly linked to a Canon printer.To get started, simply download the “Canon Printer App.”. When you click the connect button on your wireless printer, all the required data will be saved on your device. In addition, your login information and wireless internet will be remotely shifted in order to accelerate the setup procedure.
- The second Canon printer setup requirement is a router and a wireless Canon printer are required. Let us explain that to you if you are unfamiliar with it. Your wireless router is the hub that links all of the devices in your home network—including your personal computer, printing device, and phone—to the internet. All of the devices in your house can connect to your home network with this wireless network device. Since the router is an essential part of the entire procedure, you need to make certain that the internet connection is functional and that the wireless router has been set up beforehand.
- The third Canon printer setup requirement is A network connection is required for the computer that will be utilised for instructing the printer. Attempt accessing the internet to check if the printer is integrated with your computer. If that is the case, it implies your computer is connected.
Canon printer setup – Wps Setup
Setting up WPS (WIFI Protected Setup) on the printer and router is an immediate fix for whatever issues you might be encountering with the previous wireless network procedure. With it, printing from the printer to the internet will be possible directly.Consequently, make use of the following instructions to finish the Canon Printer Setup – Wps:
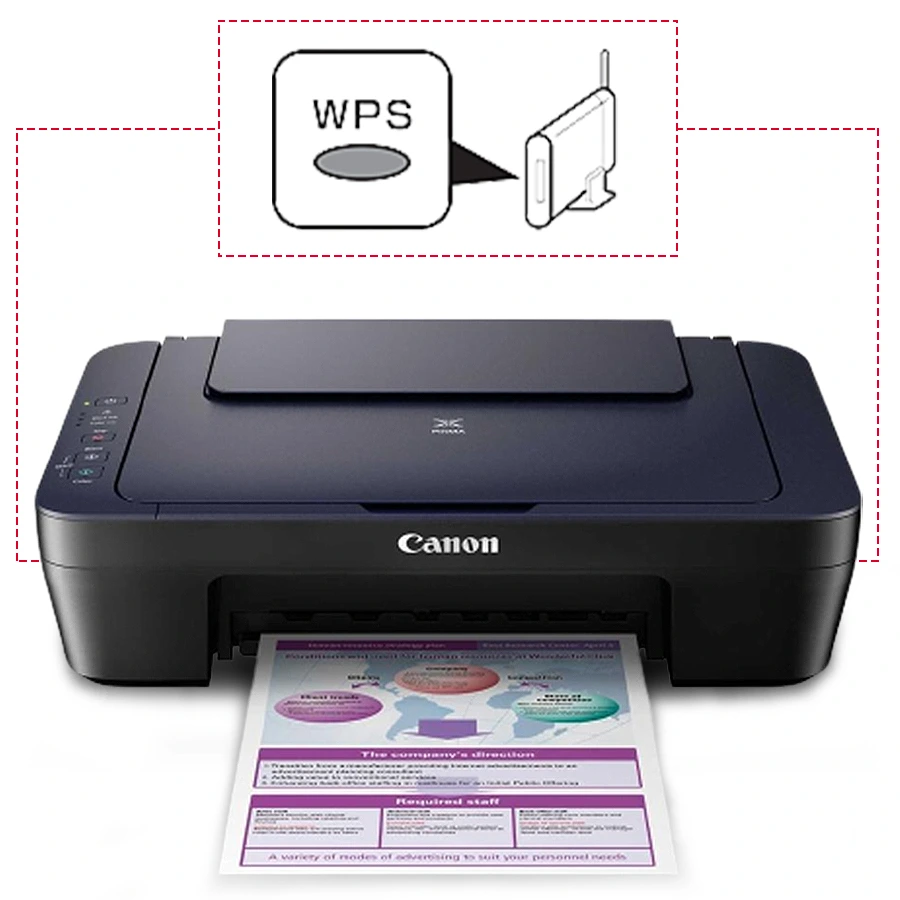
- Verify that the wireless router and the Canon printing device are compatible with WPS (Wi-Fi Protected Setup).
- Power on the Canon printing device and position it so that it is inside your Wi-Fi router’s WPS range.
- To access the wireless router, hit the WPS icon.
- Press the Canon printer’s WPS button within the next two minutes.
- An encrypted connection will be created among the printer and router.
- Verify that the printer is connected by looking at its display.
- Install and configure the Canon printer software on the mobile device you’re using.
- When installing the application, simply select a wireless connection and adhere to the instructions displayed on the screen.
- Finish the configuration and run a test print to ensure the connectivity performed.
- With your Canon printer configured for WPS, take advantage of the ease of wireless printing.
Canon printer setup – Manual Setup
To begin with, set up a gadget that works with the Canon printer. All that needs to happen for the device to function properly for connection and printing tasks is that it meets the printer’s system requirements. The procedures for downloading and Canon printer setup – Manual Setup printer drivers are listed below.
- Get a gadget that is compatible with a Canon printer first.
- Enable internet connectivity for it.
- Go to https://in.canon/en/support/download in your web browser after opening it.
- Choose the operating system by selecting it from the drop-down list.
- Select the software type that you want to download, such as a driver, firmware, or software package.
- Choose “English” as the language.
- The model number of the Canon printer you are using should now be entered in the next empty area.
- On the search icon, click.
- A pop-up window is about to appear. On the “Download” button, press.
- Once the download is finished, open the file to start it.
- As you install the drivers on the computer you’re using, you agree to the terms and conditions.
- The directions displayed on the screen should be followed.
- Finally, see whether there are any error messages displayed.
- Thus, the printer driver installation is finished. Now that it is connected to thethze printer, the device may print, copy, and scan files.
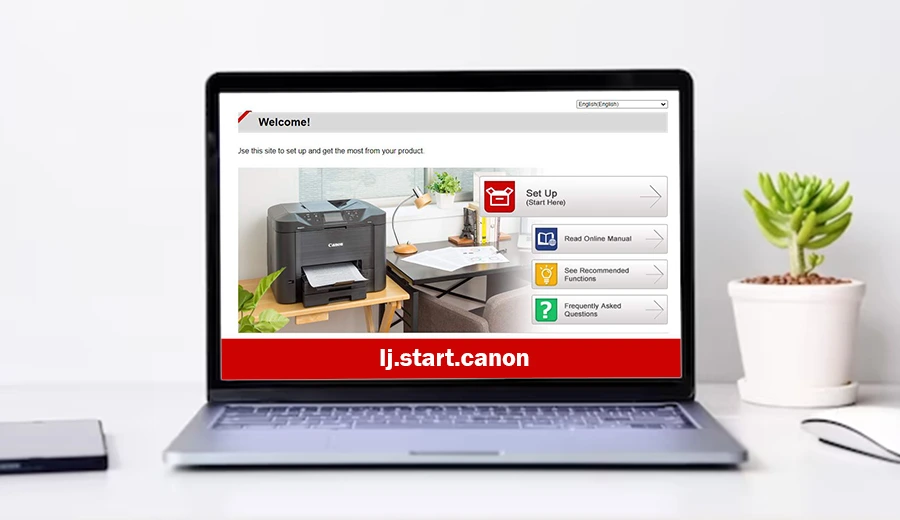
Canon printer setup via Ij.start.canon
Configure a Canon printer setup via the ij.start.canon command. To begin configuring your Canon ij printer, follow these often-used and straightforward steps to execute the Canon printer setup via the Ij.start.canon process :
- Start by launching your personal computer, such as a desktop or a laptop.
- Next, establish a connection that is either wireless or wired between your Canon inkjet printer and the system (assuming that your device is wireless).
- Third, type ij.start.canon or https://ij.start.canon into the address bar of your default or preferred web browser.
- Press enter, then patiently await for the Canon website to come up and show various instructions.
- After selecting the Configure icon, wait for a new window to show up and prompt you to enter your model number.
- To install the setup, enter the model number of your Canon camera and press Enter.
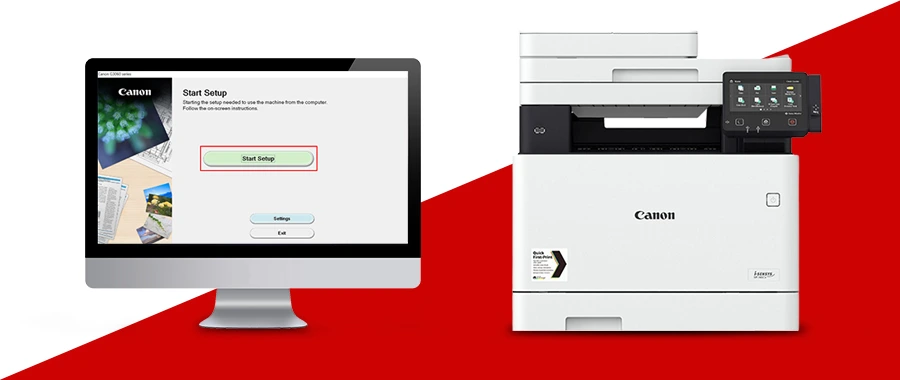
setup IJ.Start.Canon printer on Windows Using USB
To set up IJ.Start.Canon printer on Windows Using USB Check out the commonly used and easy procedures listed below to begin configuring your Canon ij printer:

- Ascertain that a USB cable is present.
- To set up a network connection via USB, navigate to the ij.start the Canon website from your browser.
- Following that, hop in and patiently await for the Canon software to activate a USB cord to link your printer to your PC.
- Select the desired network to connect your printer to by clicking Next and installing the driver.
- The Add printer option will then appear after you tap YES and hit the Complete button.
- Go to http //ij.start.canon site and select Add to download a driver.
- Go to Device settings, choose the connection, and then select LAN settings.
- Update the Canon software, replace the inkjet cartridges,and after that, authenticate that each connection you have is secure.
- Set up the Canon printer and attempt to print.
Techniques for canon printer setup
Connecting the device to the computer through a wired or wireless connection is going to complete the Canon printer wireless setup. For Canon printer setup, you may choose any of the following methods.
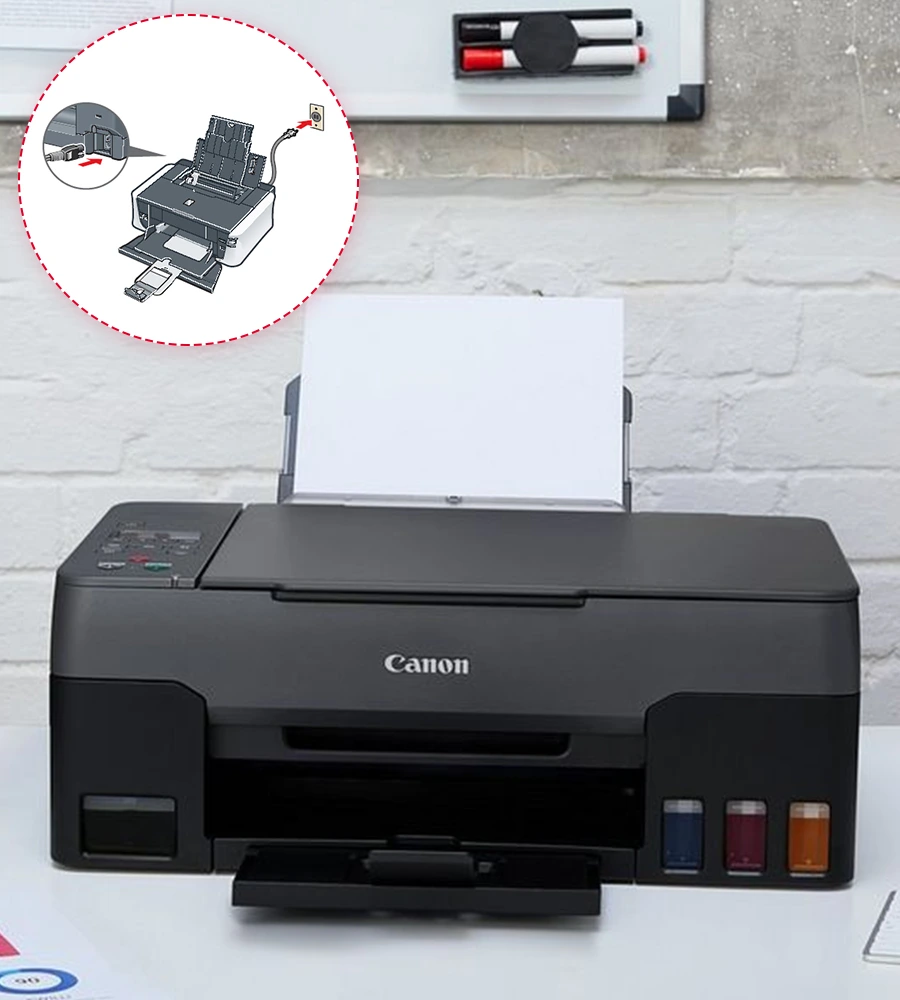
Employing a computer’s USB cord.
The Canon printer can be connected via a wired connection as the first mode of connection. Make certain that you have a brand-new, undamaged USB cord. Thus, the following are the actions to take:
- To start, turn on the computer so that you may connect to the Internet.
- The printer should then be connected to one end of a USB cable.
- Turn the USB on and place the other end into the router or PC.
- Make sure everything is snug and secure.
- In the end, adhere to the directions shown on the gadget and verify the connection.
Connectivity issues and hardware malfunctions are more common with wired connections for Canon Printer Set up. As a result, it will stop the printing and scanning processes. Therefore, to Setup a Canon Printer Wirelessly is the more dependable option.
Setup Canon Printer Wirelessly
Setting up high-speed Wi-Fi is a prerequisite to connect Canon printers to wifi. Next, print, scan, and copy jobs should be completed after the printer is connected to the internet. These are the setup guidelines for the printer’s WiFi.To start the process, click the printer’s “Setup” button.
- Start by positioning your Canon printer in an ideal spot that is within your Wi-Fi network’s coverage zone.
- Turn on the printing device and navigate to the settings menu via the control panel.
- Choose the Wi-Fi network you would like to link to by heading to the wireless settings.
- When prompted, input the Wi-Fi password, being sure you enter it precisely. Go ahead and complete the wireless configuration after verifying the connection.
- The Canon printer software can be downloaded and installed on a PC or handheld device.
- To finish the wireless configuration, identify an appropriate network before installation and adhere to the instructions given on the screen.
- After everything is set up, confirm that the wireless connection has been established by performing a test print.
- For increased convenience, use wireless printing from any device linked to the same network as your Canon printer.
Canon printer setup WiFi for Windows devices
First, download and install the printer drivers from https://www.usa.canon.com/support/software-and-drivers on your computer before linking the device to a computer with Windows. Following that, take the following actions Canon printer setup WiFi for Windows devices
Canon printer wireless setup for Mac Devices
With Mac OS X 10.6 or later, Canon printers may also be used with Mac operating systems. The drivers are available at https://www.usa.canon.com/support/software-and-drivers for downloads and configuration. Next, establish the following connection between Canon printer wireless setup for Mac Devices:
- The computer and printer need first be connected to the internet.
- Following that, select “Settings” from the Apple Menu.
- In the sidebar, look for and select the “Printer and Scanner” tab.
- After selecting your printer’s name, click the “+” symbol.
- To add the printer, press the OK button.
- To verify that the connection was successful, verify it now and print the test page.
Can’t access canon printer setup
Canon printer setup common issues due to which you can’t access canon printer setup. Here are a few of the causesthe reasons that cause your canon printer won’t connect:
- Forgot Password Issues
- Account Lockout
- Network Connectivity Problems
- Browser Compatibility
- Two-Factor Authentication
Troubleshooting Steps when your Canon printer won’t connect
Conclusion
A thorough explanation of the procedures needed to set up your printer has been presented in this article. You can thus successfully set up your printer on Windows and Mac devices by adhering to the processes outlined above and using http//ij start canon. If you failed to do so then you must contact our canon team who will help you throughout the process.